Ready?
You have received your advanced connected vehicle devices from Force Fleet Tracking.
Want to install them properly?
It’s easier than you might think.
STEP 1
Plug in and Drive
With the engine off, locate the onboard diagnostic (OBD-II) port.
This port is usually below the driver’s side dashboard, but it can be in several locations. See the image above for some likely locations. In some vehicle makes, the port is covered by a sliding panel.
Securely plug in the device. Make sure it plugs in all the way and is not loose, but be careful not to damage the pins.
The Force OBD plug-in device is designed to slide into the port snugly. If you are installing devices into multiple vehicles, we recommend you take a picture of each device label and note the vehicle in which it is installed.
After you plug in the device, take the vehicle for a quick drive to activate the device.
This shouldn’t take more than a few minutes. Make sure you drive in an area with good cellular coverage (i.e., not in an underground garage).
STEP 2
Customize your account
Sign in to the web app using the activation link sent to the account owner’s email. Don’t see that email? Check your spam folder. If you still don’t see it, click here.
Get the most from Force by inputting license plates and vehicle names, and adding drivers and geofences. There are many areas where you can set up and add info to get better insights.
STEP 3
See where your business is going
For full features, check out the Force web app on your computer at https://force-us.moj.io/.
On the go?
Want to install devices in a heavy duty truck?

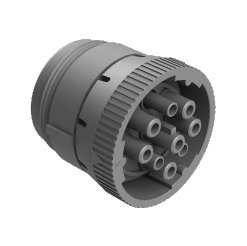
For J-1939 ports

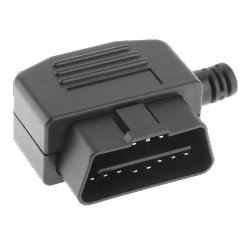
For 16-pin OBD ports

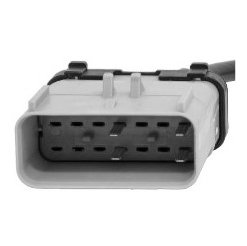
You can use either RP-1226 or J-1939 cables, your choice
STEP 1
Make sure you have the right cables.
STEP 2
Connect the standard Force GPS device to the end of the cable with the OBD connection.
If necessary, secure the connection with electrical tape, but avoid covering ports or device-specific information on the label. (We recommend that you DO NOT use zip ties to secure the device into the connector as you may want to remove the device for troubleshooting later.)
STEP 3
Connect the other end of the cable to your vehicle’s port.
If the cable you have does not fit into the port, stop. You may have the wrong cable for your vehicle. Take a picture of your vehicle’s port and send it to us at [email protected] We will get you the right cable.
STEP 4
Once the cables are connected, secure your Force GPS device under the dash.
We recommend zip tying to a secure fixture. NOTE: Try to secure the device so that the label is still visible and the device is accessible in the future.
STEP 5
Get Set-Up Online.
Sign in to the web app using the activation link sent to the account owner’s email. Don’t see that email? Check your spam folder. To get the most from Force once you’ve added your vehicles, fill out the vehicle profiles by adding custom names and license plate numbers. You can also add your drivers and assign them to vehicles, and set up geofences if desired. For more insights into the Force interface and available features.
On the go?
Ready to see what it can do for your business?
Questions? Call us at 806-855-8255 or email us at [email protected]