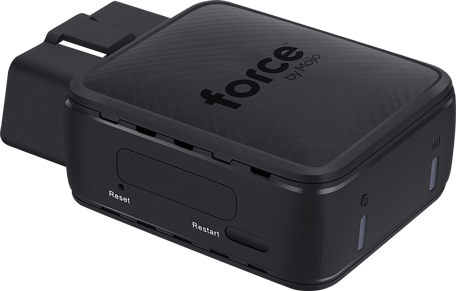
Fleet tracking hardware can be overwhelming (and even complicated) to some. You might be asking yourself: “where does the device plug in?”, “did I install it correctly?”, or “how do I know if it’s on or working properly?” These are all very normal questions and ones that Force Fleet Tracking has taken into consideration when creating our device.
Not only is our fleet tracking hardware affordable, but it’s also incredibly easy to install. Follow these simple step-by-step instructions below and you’ll quickly be on your way to seamless fleet management for your small business.
How to install Force Fleet Tracking
- Take the device out of the box
- Plug it into your OBD-II port
- Wait for the green lights
- Download the app & sign in
- Let Force automatically connect the vehicle to your account
- Go for a short drive
- Check your Force dashboard to confirm
1. Take the device out of the box
Carefully remove the device from the box. Be mindful when using sharp objects like scissors or letter openers to open the package as these can damage the device.

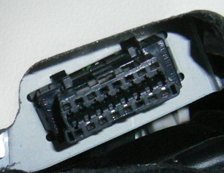
2. Plug it into your OBD-II port
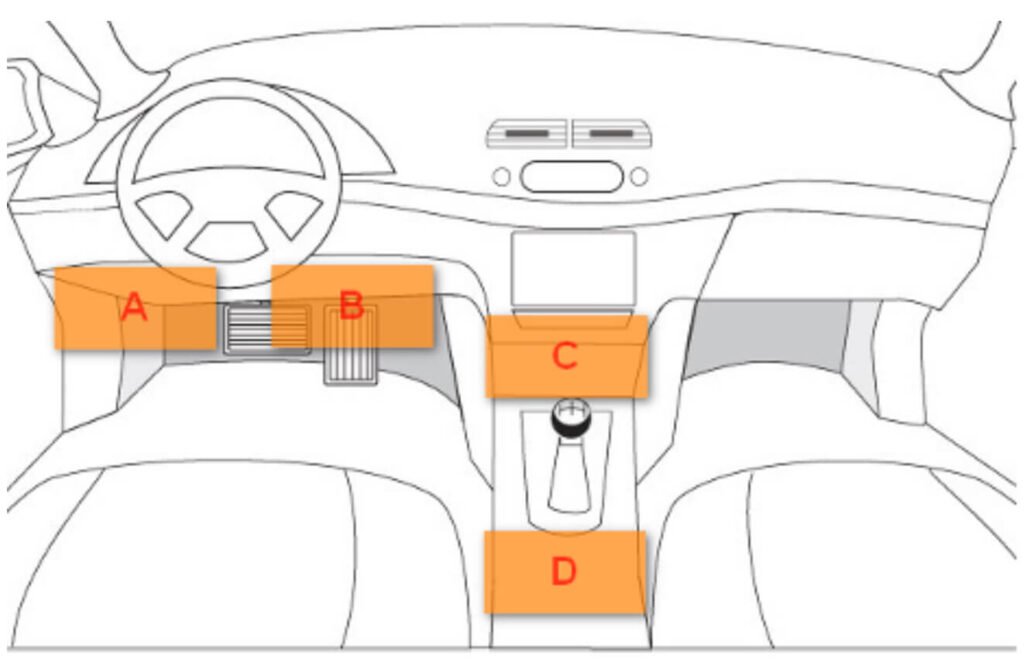
With the vehicle turned off, carefully insert your Force device into the OBD-II port. The OBD-II port is usually located under the dashboard near the steering wheel (often within 18 inches).

The OBD port of most cars and trucks is located in the A or B area in the figure below. If you can’t locate the port under the dashboard, look in the C or D area.

In some cases, like with Mercedes Sprinter vans, you may find the OBD port on the passenger side on the underside of the dashboard behind a plastic trim that can be removed with a twist nob.
If you can’t locate the OBD-II port for your vehicle, refer to the driver’s manual for specific instructions.
3. Wait for the green lights
Wait for about 20 seconds until two green lights appear on the device. One should be solid green (this is the power light) and the other should be blinking green (this is the network light).
4. Download the app & sign in
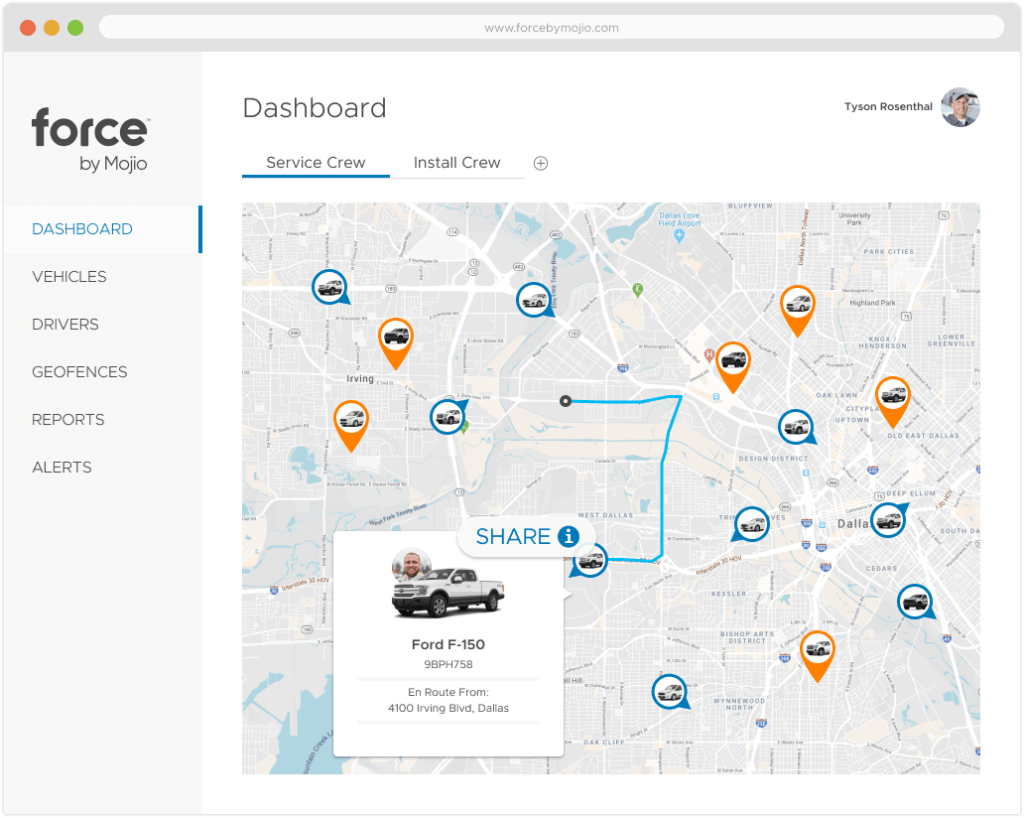
Download the Force Fleet Tracking app from the App Store and sign in with the account details Force sends to your email upon signing up. The app allows you to view vehicle tracking and manage your drivers and vehicles from your smartphone.
You can also sign into your account on our website which offers you the same control as going through the app.
5. Let Force automatically connect the vehicle to your account
Sit back and let Force automatically connect the vehicle to your account. You don’t have to manually upload any details about the vehicle. Force automatically reads the car’s VIN to collect the information it needs (e.g. make, model, year, etc.) so you don’t have to do any additional setup. With other vendors, you might need to set up all of that manually.
6. Go for a short drive
Now it’s time for a test drive. Take the vehicle for a short drive to see if the device is properly tracking. The drive should be in an area with good reception and between 5 to 10 minutes long (this should be enough time for the device to register). Avoid checking your phone while driving.
7. Check your Force dashboard to confirm
After the “test drive” and once you’re parked, check your Force dashboard through the app or our website to see if the trip was properly tracked.

If the trip doesn’t appear, follow these steps:
- Check that the device is working normally. The power light should be solid green and the network light should be blinking green.
- Turn off your vehicle and restart the device by pressing the “Restart” button on the side of the device. You don’t need to unplug the device to do this. Once the lights register green again (solid for power, blinking for network), go for another drive. If the lights don’t register green after restart or your second trip still does not register in your Force dashboard, please contact [email protected].
- If the device has been working normally and your trips stop appearing in your Force dashboard, follow the steps to restart your device. If this doesn’t resolve the issue, please contact [email protected].
You can use the same troubleshooting steps listed above if you run into the same issue down the road.
Force’s fleet tracking devices are the easiest to install. But don’t just take our word for it. Learn more about the process from some of our customers.
Installation FAQs
How much time does installation and setup take?
Force can be installed in just a few minutes per vehicle. Once you get your devices in the mail, just plug them into the OBD-II port in each vehicle and follow a few simple on-screen instructions in your web browser. That’s it!
How do I create drivers on the platform?
In your Force Fleet Tracking dashboard, select “Add Driver”. This will prompt you to add another driver to the fleet and add details about them including their name, driver’s license number, and more.
How to assign drivers to vehicles?
To assign a driver to a vehicle, go to the “Vehicle” section of your digital dashboard and select the vehicle you’d like to assign. You’ll then be taken to a screen that lists all your drivers and you can select “Assign Vehicle” to the driver. To save, select the “Done” button. You’ll then have the option to send the driver an invite to download the Force app.
How do I unassign old drivers?
To unassign an old driver, go to the “Drivers” section of your Force dashboard, select the driver by tapping on their profile, then tap on the three vertical dots (on the far right) to remove the driver from the fleet. If you have more than one fleet, you can switch the driver to another fleet.
What about emissions inspections?
Emissions inspections are something every fleet vehicle needs to go through. Depending on the state you’re in, it might even be the law. These can be a huge pain for small businesses; the last thing you want is hard-to-unplug cables.
If you run into this issue, simply unplug the device. With Force, this is super easy because our devices can be unplugged without a problem. Other companies, on the other hand, may have cables, installed hardware into the dashboard, or Y cables which could be seen as a modification.